Patriot Pavers

Thin Brick Veneer Installation Guide

Why Patriot Pavers? Patriot Pavers are designed for fast, easy installation—delivering the authentic look and texture of real brick without the weight or hassle of traditional masonry.
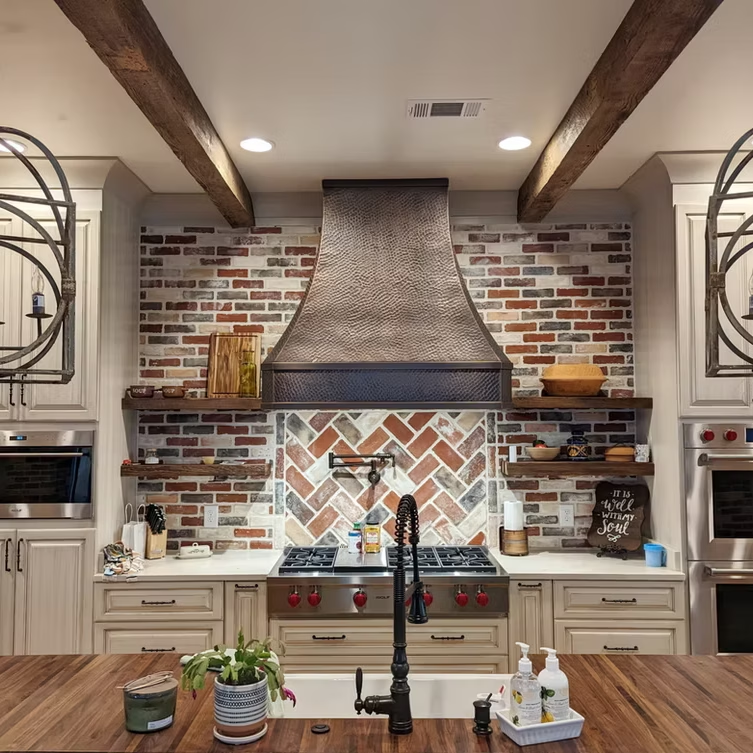
Patriot Pavers Gallery Image

Tools & Materials Checklist

trowel-white

Polymer-modified thin-set mortar – for strong adhesion

trowel-white

½” X ½” square-notch trowel – for proper mortar application

trowel-white

Hand held grinder or tile saw for cuts.

trowel-white

Chalk line & straightedge – for clean, accurate layout lines

trowel-white

Crack-suppression or uncoupling membrane (e.g., Ditra®, ProvaFlex®) – recommended for wood subfloors or cracked slabs

trowel-white

Grout – Patriot-approved grout or any sanded grout suitable for ½" joints. Donot use epoxy grout or all-in-one type grouts.

trowel-white

Sealer – SC-25 Paver Seal (Gloss or Matte); use an anti-slip additive for exterior projects

trowel-white

Floor finish – Super Wax or Matte Finish for added protection and shine

trowel-white

Application tools – grout float or grout bag for grouting, ¾” nap paint roller for sealer, Micro fiber pad, lambswool applicator or 100% rayon mop for floor finish.

trowel-white

Safety & prep items – utility knife, eye protection, protective gloves

circle-1-solid-full

Surface Preperation

For exterior wall applications, follow MVMA (Masonry Veneer Manufacturers Association) guidelines. This includes proper installation of a weather-resistant barrier, metal lath, and a scratch coat to ensure long-term durability and adhesion.

circle-2-solid-full

Panel Application

Use polymer-modified thin-set mortar or Type S mortar to bond Patriot Paver bricks to the prepared surface.

Spacers may be used with care to help with proper spacing.

Allow bricks to set overnight before beginning the grouting process.

circle-3-solid-full

Grouting Methods

Choose the method that best fits your project and skill level:

Grout bag – Provides clean application with less mess; allows for more placement time. Allow the grout to stiffen in the joints before striking excess mortar from the joints. A light brooming can smoooth the joints and remove any remaining excess grout.

Grout float / sponge / hand-packed – Offers faster coverage but requires multiple cleanings to eliminate haze. Always wear gloves to protect your hands.

Care & Maintenance

Routine cleaning: Dust mop or damp mop as needed using clean water or a pH-neutral cleaner (e.g., Zep pH Neutral Floor Cleaner). Avoid harsh chemicals like vinegar, bleach, or Pine-Sol®, as they can damage the finish.

Protective finishes: Reapply PortStone Super Wax Floor Finish as needed to maintain a durable and attractive surface. Use 100% rayon applicators to avoid lint.

Furniture & rugs: Add felt or rubber pads to furniture legs to prevent scuffing.

NOTICE - SYNTHETIC RUG BACKINGS AND PADS CAN ADHERE TO THE SEALER AND FINISH, ACTUALLY MELDING INTO THE SEALER. IN MOST CASES THIS CANNOT BE COMPLETELY REPAIRED. THE ONLY EFFECTIVE WAY TO REPAIR THIS IS TO REMOVE THE AFFECTED AREA AND REPLACE WITH NEW MATERIAL. This is a common issue within the flooring industry, not just specific to our products. We suggest that you google “Rug backing stuck to my floor” for more information. PORTSTONE MANUFACTURING CORPORATION MAKES NO WARRANTY WHATSOEVER REGARDING RUG PADS OR BACKINGS OF ANY KIND CAUSING DAMAGE TO ANY PORTSTONE OR PATRIOT PAVERS FLOOR.

Warranty Snapshot

Patriot Pavers products are covered by a one-year limited warranty against manufacturing defects. Please inspect all materials prior to installation—once installed, any defective products are no longer covered. Warranty covers product material only and does not include any labor or installation costs.

circle-1-solid-full

Surface Preperation

Clean the surface thoroughly – Remove dust, dirt, paint, grease, or any residue that could affect adhesion.

Address cracks and subfloor conditions – Use a crack-isolation or uncoupling membrane (like Ditra® or ProvaFlex®) over concrete or wood substrates as needed. Note: Cement or gypsum backer boards are not recommended over wood subfloors.

circle-2-solid-full

Layout & Adhesion

Plan your layout – Use chalk lines and a straightedge to ensure the pattern remains straight and square to the room.

Apply mortar – Spread polymer-modified thin-set mortar using a ½” X ½” square-notch trowel.

Set the bricks in place– Firmly press the bricks into the mortar bed without over-compressing. Lift a few bricks during the process to verify full coverage. Back-buttering the brick tiles may be occasionally necessary to ensure a good bond.

Cure time – Allow at least 24 hours before walking on the surface.

circle-3-solid-full

Grouting

Wait before grouting – Let the mortar cure for a minimum of 24 hours.

Use the right grout – Fill joints with a Patriot-approved grout or any sanded grout suitable for ½" wide joints.. Work in small sections and clean excess grout as you go.

Avoid problematic grouts – Do not use epoxy-based or all-in-one grouts with built-in sealers, as they can permanently adhere to the brick face and be difficult to remove.

circle-4-solid-full

Sealing

Patriot Pavers can be order pre-sealed or you can apply the sealer yourself before grouting. Call us so we can discuss the best method for your application.

Apply final sealant – A final coat of SC-25 Paver Seal (Gloss or Matte) is recommended 24 hours after grouting.

For outdoor projects – Always add an anti-slip additive to the final coat to reduce slickness when wet.

Top coat –Interior applications only - Once the sealer has dried (typically 2–3 hours), we suggest that you apply two coats of Super Wax or Matte Finish to keep that fresh, new look much longer. Allow 30–40 minutes of dry time between coats.

circle-5-solid-full

Exterior Installation Notes

Anti-slip additive is required in all exterior applications for safety.

While Patriot Pavers supplies grout, sealer, and finish products, you will need to source any crack-suppression or uncoupling membranes separately (e.g., Ditra®, ProvaFlex®).

This installation guide is provided to give some general, basic information concerning the installation of our products. It is NOT intended to serve as a complete, detailed reference for every application that may occur. For proper installation of any PortStone or Patriot Pavers product we recommend you consult the Tile Council of America, Inc. Handbook for Ceramic Tile Installation and the ANSI ceramic tile installation specifications. These manuals should be available at your local tile dealer, or contact the Tile Council of America, Inc. P.O. Box 326, Princeton, NJ 08542-09326.

Prior to installation, all substrates must be properly prepared and inspected according to the setting material manufacturer's recommendations.

All pre-existing cracks in the floor or wall surface must be addressed. The floor surface must be thoroughly cleaned of all material such as varnish, dust, saw dust, spackling, plaster and paint.

Wood substrates are not the optimum substrate for any tile installation. For installations over wooded subfloors, we do not recommend the usage of cement or gypsum based backerboard material. If there is any movement of the subfloor, there is no place for that movement to go other than the joints between backerboard sections causing the tile to crack directly over the backerboard joints. For this reason, when installing Patriot Pavers or PortStone over wooden subfloors, we require the use of an isolation membrane such as Ditra, Provaflex or other such underlayment product. These type membranes will absorb most movement common in wooden subfloor applications, preventing such movement from cracking the tile. We do not warranty against damage to our products resulting from subfloor movement or cracks in concrete subfloors.